Wednesday, January 9, 2019

Apttus CPQ : X-Author Template - Print Format Permissions


                                                         All rights of Content and Images are reserved to APTTUS Corporation
Hi All,

Lets discuss about the print formats permission for different profiles.

USE CASE:

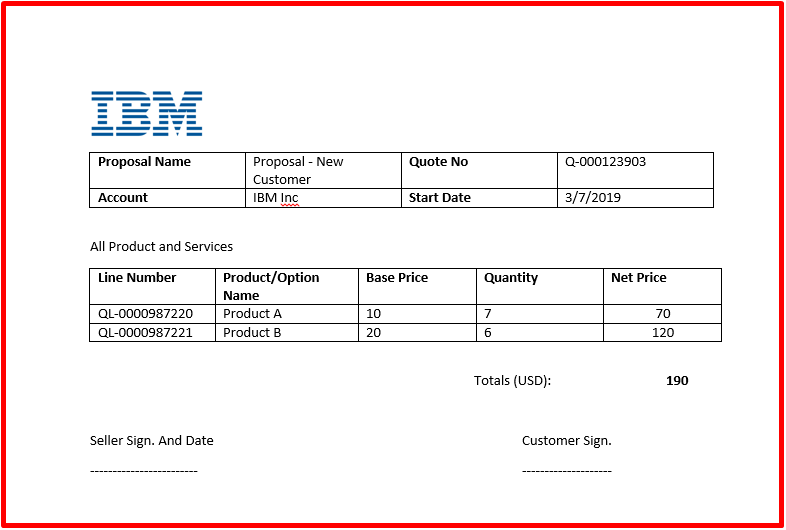
For some user, we want such restrictions that they should be able to generate quote is pdf only so that further alteration will not be possible (like word doc).

See the below image:
By Clicking on Preview Button:


You can see the different output formats here, user can select any of these. But we want to restrict user with .pdf only.


How to do that ?

There are few steps to follow:

1. Go To All Tabs
2. Search and Open tab 'Proposal Document Output Formats'
3. Select the Profile from drop down for which you want to restrict the permissions to pdf only.


4. Click on Edit Button.
5. You will see the below screen:


Proposal Type: These are the record type of proposal, for which record type we need to put restrictions.
Choose the PDF in radio buttons for the record type.
Allow Watermark : You can place a watermark. There is default watermark which appear on Previewed Proposal, not on Generated Proposal.

NOTE: Generate button have this 'Watermark' optional. Preview button do not give any option o select or deselect this Preview check box. If you 'Allow Watermark' in above setting, it will put watermark text by default on previewed file.

Now, lets see the these changes, Click on Preview Button.


You can see that by default we got PDF selected. All other format radio buttons are in disable mode, user can not select any of them.

Just select the template and generate the preview.

If you are facing any issue in this setup, just reach out to me radhe636@gmail.com or +91 8574715370

Thanks


Apttus CPQ: X-Author Contract (for Word)


 All rights of Content and Images are reserved to APTTUS Corporation.

Hi All,
                                                 
Today, let’s discuss about X-Author Contract (for Windows OS).
X-Author Contract for word is a MS Word Plugin which is used to design dynamic templates for your Quotes or for your contracts.
To Setup this plugin, just download from Apttus Portal.
Below are the steps:
Login, Choose Apttus Install Center


Select the below tool and download.


Install it in your machine. 

Now, Attach this plugin in your MS Word.


Go To Options -> Add Ins


Select the X-Author Contracts, click ok.

Now, wait for few seconds, you will see 2 new tabs in to ribbon in your MS Word.


Make a connection with Salesforce
Connect to Salesforce, see image


Now you are logged in successfully.

If you want to edit the existing template, click on Check out, but I do not have existing, I am going to create New template.


Click on ‘New’


Fill the details


Click ‘Create New’
On Blank Page, Create Some Structure of your Template. Put logos, tables, Labels.


Now, insert the fields from Proposal which will render dynamically at the time of proposal 


generation.


You will see Quote/Proposal fields like below:


Select the field and insert in proper cell against your Label


Now, for Line items, Select Insert Field from Menu, the select the Line item(see below) and select the multiple field with CTRL+Click.
Mark Insert as a table.


Click Finish.


All Line Columns will be inserted.


Now click on Check-In


Activate and Click on Check In.

Now we are done here with template Creation.

Go to SFDC, Search for 'Template' tab and open.

Put Your Proposal record type name in ‘Agreement Type’ field.


Your file is here below in Attachment.


Now Go to Proposal and try to Preview this.


Select the format and Listed file, click on Generate.


And we are done. You will get the below result. J


If you are facing any issue in this setup, just reach out to me radhe636@gmail.com or +91 8574715370

Sunday, January 6, 2019

Apttus CPQ : Handle Conditional Pricing Using Price Matrix


                                                                              All rights of contents and logo are reserved to APTTUS Corporation.

Hi Geeks,

Here I am back with one more informative article.
Discussing, how to handle the complex and conditional pricing in Apttus CPQ.

Lets take a use case:

Kloudrac is a company which have vary good relation with Cisco and have 5 star rating, Kloudrac used to buy the conferencing and other tools from Cisco.

For 5 Start rating customers, Cisco give the 30% flat discounts on certain products like WebEx Premium.

We know that we can handle this  scenario using apex code easily in Pricing CallBack class.
But Apttus has given the Out Of Box configurable feature to handle such scenarios.

Here: Kloudrac is Account with 5 Star Rating.


Lets setup step by step:

Step 1: Create Formula field 'Customer Rating' on Line Item
Step 2: Create Price Dimension by taking Line Item's 'Customer Rating'
Step 3: Create Price Matrix for 'WebEx Premium's Price List Item.
Step 4: Define Matrix Entries based on Criteria and Dimensions(created in step 2)
Step 5: Save and run the 'Criteria Maintenance' job.


Step 1: Create Formula field 'Customer Rating' on Line Item

Fetch 'Rating' field from Account to Line Item (Apttus_Config2__LineItem__c) object using formula field.
We are adding this field on Line Item because, we need to define the Price Dimensions where we will use this 'Customer Rating' field from Line Item.


Step 2: Create Price Dimension by taking Line Item's 'Customer Rating'

Navigate to All Tab -> Price Dimension ->New


Step 3: Create Price Matrix for 'WebEx Premium's Price List Item.


Define the following values in Summary tab.


Step 4: Define Matrix Entries based on Criteria and Dimensions(created in step 2)
Switch to 'Detail' tab and fill the values for 'Matrix Entries'


Step 5: Save and Run the 'Criteria Maintenance' job.

And we are done.


Now, Add your product in cart. You will see the applied adjustments on List Price.

If you face any issue in this setup, give contact me on +91 8574715370 or drop email on 'radhe636@gmail.com'

Thanks.
Radhe S


Sunday, January 28, 2018

Apttus CPQ: Categories Setup

All rights of contents and logo are reserved to APTTUS Corporation.
Hi Friends,

In this blog we are going to explore that how we ca setup the Categories and a hierarchy level under offering Category.

Categories - Categories are the main part of your CPQ. It defines the UI representation of your catalog where you showcase the products/services for sell.

For this setup, You should have the list of priced products in system, you can find the way to setup product and way to pricing of product here.

Now come to categories.

Steps to define:
Navigate to Category Tab.

Create New Category - Type offering.
Associate the Price List with this offering Category so that it will be visible on catalog when you will create Quote by taking this Price List

 Click On Hierarchy Manager button (put on layout if not there), and open the following page.
On this page you can create the subcategories as per your requirements.


Once you created the subcategories, You can add the products under these subcategories now.
See the following Images:


You can see the Added products on "Remove" tab. These products can be bundles or standalone. 


Now Save this and run the "Category Maintenance" job to commit these configurations.


Now its done!
Time for Testing - Create a quote by taking Price List which is associated to Offering Category.
You will see that all products you added under categories and subcategories/hierarchy are available for sell on your catalog. Just Pick the products and move to cart and finalize the quote.


This was the process to setup the categories in Apttus.


In Next Post We will see: How To define Complex Pricing in Apttus

Thanks For Reading
If you have any queries or suggestions, reach me on radhe636@gmail.com/+918574715370.

Apttus CPQ: Pricing Setup for Products


*All rights of contents and logo are reserved to APTTUS Corporation.

Hi Friends,

In this blog we are going to learn how to setup the pricing for a product.
Before this, please go through last post How to Setup Product in Apttus CPQ


Once you setup the product, for setting up the pricing here are the steps:
1. Create Price List
2. Create Price List Item for Product
3. Define the List Price, Charge Type, Price Type, Effective Dates etc.
4. If you are setting the Billing, Taxation and Revenue process for products, you need to fill these details as well.
5. Make sure, PLI is Active, if it is not active, your product will not be visible on catalog page.

Ok, Let's start...

Click on Price List Tab and create new Price List and fill the following details.


Now, Open the Product for which you want to define the price.

Open Product
Click on New Price List Item and fill the details - If you are not able to see this related list, put this on layout.


Fill the following details - for CPQ prospective, this is the minimum detail you need to fill. For other features like Billing RevRec, Taxation, I will post details later in separate blog.


Once you fill all these details Save this.

Lets have a look of these fields:
Price List - This is master Price List which will contains many Price List Items for Different Products. This Price List defines the visibility of your categories/offerings in catalog page once this is associated to any Offering category.
This is like the Price Book in salesforce.

Product: This is product or service for which you are defining the price by creating this price list item. This product may be Standalone, Bundle or Option.

Charge Type: this is type of your charge for system understanding that what kind of charge you are imposing on a customer for this product or service.
This may be your Subscription Fee, Installation Fee or Standard Price.

Price Type: Generally there are 3 type of price, Recurring, Once Time and Usage
Recurring: If you are selling some service which payment is to be made every after certain period, like you are selling some Subscriptions for 1 year for  which you are charging a certain amount ($14)  every month, so this will be your recurring charge which will occur till next 12 months.

One Time: One time chargeable. Full Payment at time on purchase.

Usage: Pay for what you are consuming - Bill will be generating as per the user consumption.

Frequency: Its for Recurring: Monthly, Quarterly or Yearly basis.

Price Method: Per Unit , Flat Price, Tier Price(For Usage Price Type)

List Price: This is the price for your product that will be available on catalog.

Effective and Expiration Dates: What is lifetime of this Price.

Charge Type Criteria: If you want to apply this price conditionally, you can define the charge type criteria as well. For Example, if you want to apply this price only if we are placing New Order, we can put the conditions like this:


After doing all this stuff: Execute the Maintenance jobs for Pricing.


Now your pricing is ready for Product.

In Next Post We will see: How To define the Categories In Apttus

Thanks For Reading
If you have any queries or suggestions, reach me on radhe636@gmail.com/+918574715370.